Connect Twitter to the Avalanche Blockchain with Starton
And Here comes a new tutorial !
And Here comes a new tutorial!
Today, we are celebrating our new Avalanche integration showing how to use plugin integrations on Starton Connect.
We’ll be using the Zapier Integration to automatically mint new tokens on a smart contract every time someone retweets this tutorial with their address!
All of this, from contract creation to Twitter posts without writing any line of code.
We will deploy it on Avalanche, as it is a well-known blockchain with an incredibly fast time-to-finality and is one of the most secure Proof-of-Stake blockchains on the market.
This implies a very low energy consumption on block validations and low fees on every transaction and smart contract deployment.
As they are very involved with the blockchain community, Avalanche also provided test faucets for all our users so you can create C-Chain smart contracts on Starton with ease!
Alright, we are good to go!
I) Deploy the smart contract on Starton Connect
Log yourself on Starton Connect.
You can then deploy an ERC20 Mintable by going in the left panel where you can find the Deploy service :
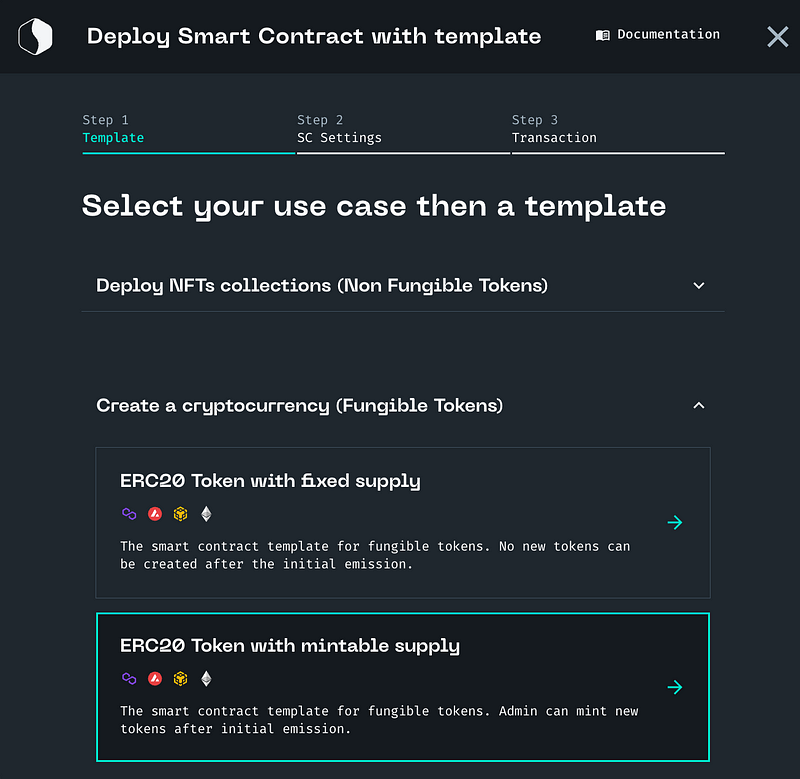
After you selected the Token with flexible supply (ERC-20 mintable) template you’ll be redirected on the deployment page.
Here, we have an ERC20 so this contract requires a name (this one will be displayed on blockchain explorers), a symbol (like ETH, BTC, AVAX …), and an initial supply.

The final step is to fill in the parameters of the smart contract.
We need to pick a wallet and select the blockchain/network:
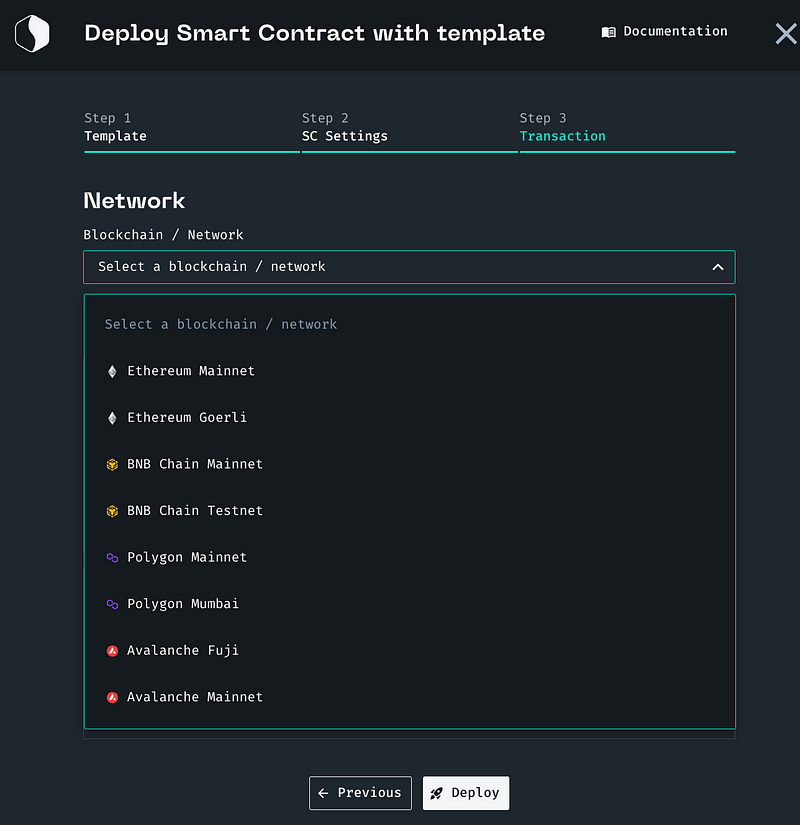
We will mint all tokens so let’s start with an initial supply of 0.
Click on deploy and … done! You have created your own crypto token!
II) Connect Starton to Zapier
Go on the Zapier platform and log yourself in (create an account if necessary).
You can find the Plugins page on the left panel of the interface.
Get there and once you have selected the Zapier plugin, you should have a page that looks like this :
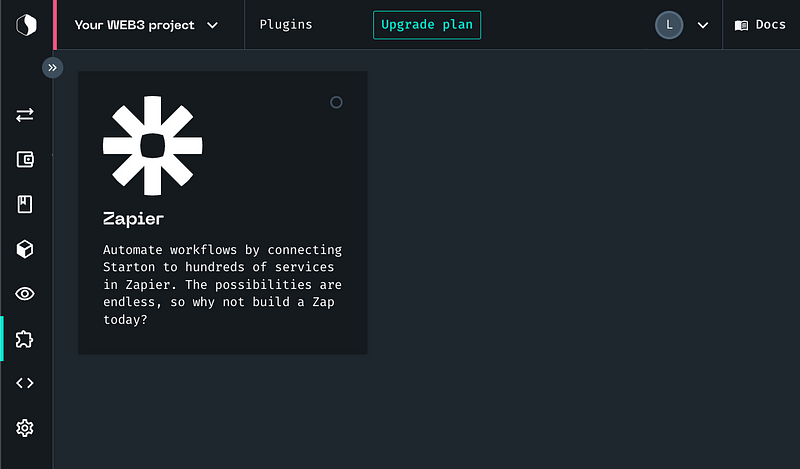
When clicking on the Zapier card you are redirected to Zapier and receive an invitation to use Starton on Zapier.
Once you accept the invitation, you should be able to use Connect in your Zaps!
III) Create a Zap and its Trigger
We want the users to retweet our tweet, using the “#Starton” hashtag, and to provide their address in the tweet.
Our smart contract will then reward them with LOVE tokens that will be sent to their address (to make the world a better place, you know).
On Zapier’s dashboard, we can create a new Zap on the right panel.
We’ll do so and name it “The Love Giver”.
We will need to define a specific trigger that will then result in a call on Connect’s API.
The Twitter one should be perfect :
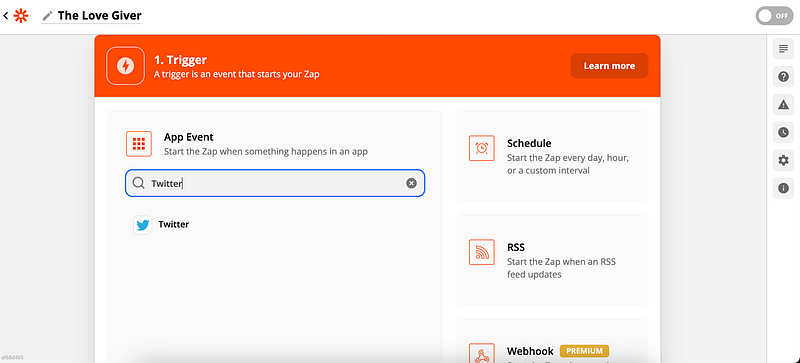
As the “Trigger Event” we’ll pick the “Search Mention” one.
In the next step, the Zap requires us to connect our Twitter account.
This is required because the Zap will need to call Twitter’s API to check for new retweets.
In the final Trigger step, we need to specify the “Search Term” that will be looked for in tweets.
Let’s put in “#Starton”.
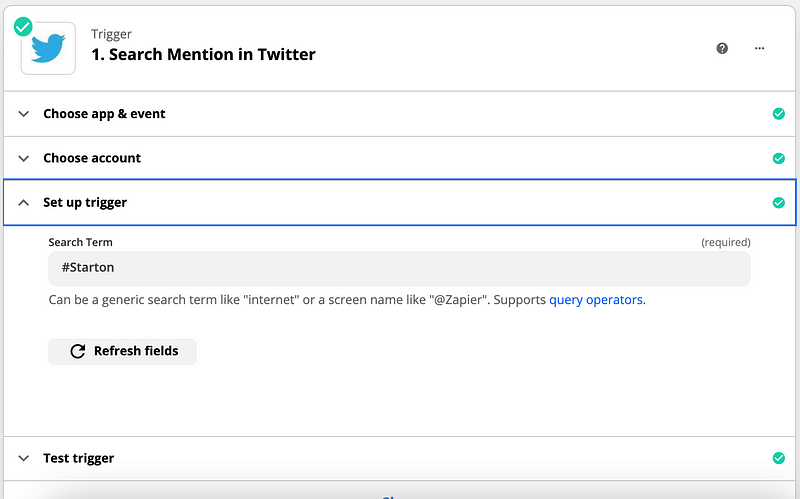
A last optional step allows you to test the Trigger to check what is the format of the retrieved data.
IV) Filter the tweets
At this stage, we only filter the tweets with our hashtag, but we only want to keep the tweets that quote our original tweet.
We will need to add a “Filter” action to our Zap to do so.
You can find it on the right side of the “Action” panel.
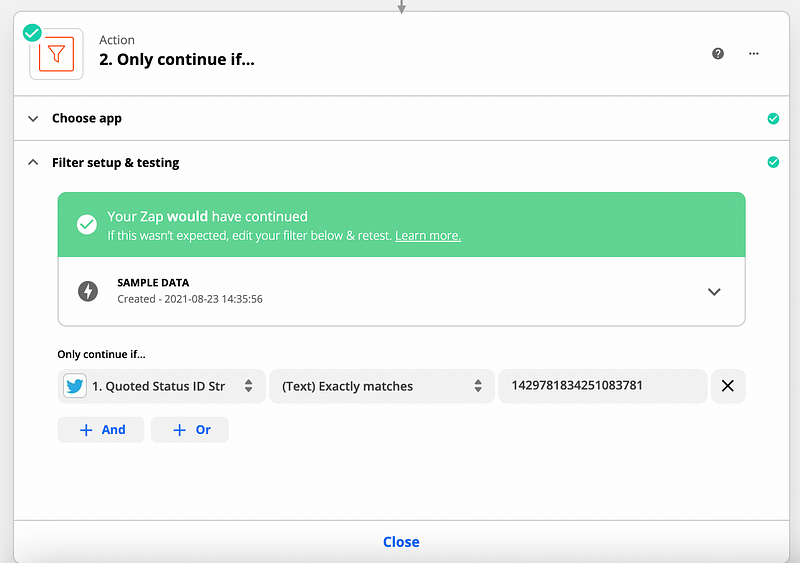
You will be asked to fill the “Condition -> Relationship -> Value” fields.
Our condition will be on the “Quoted Status ID Str” which is the full id of our original tweet.
And we’ll want it to be exactly equal to 1429781834251083781.
If you cannot find the “Quoted Status ID Str” it is probably because the Test result from Step I) is not a quote of another tweet (retweet with comment).
V) Parse the tweet’s content
Now that we have filtered out the tweets we didn’t want to process, let’s parse the content to gather the users’ addresses.
We’ll create a new “Format” action for it, which can be found just under the “Filter” in the “Action” panel.
As an “Action Event” we’ll pick “Text” and as a “Transform” we take “Extract pattern” so we can use a regex to parse the address.
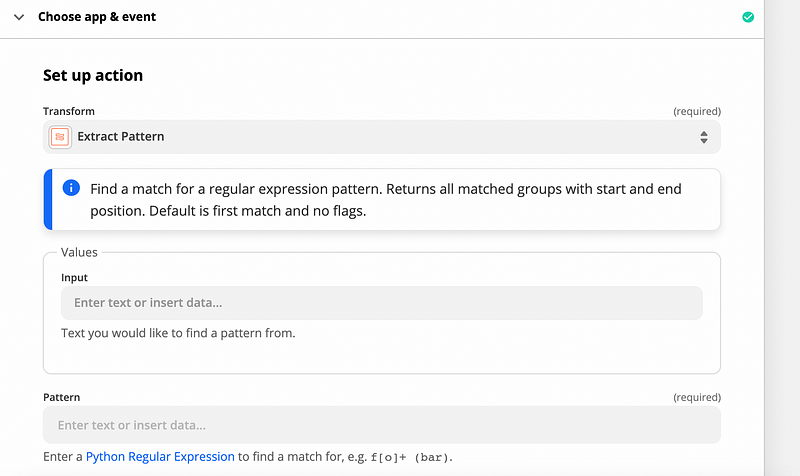
The “Input” we want to parse is from the Twitter action and is the “Text” field.
The smart contract lives on the Avalanche C-Chain, so we know that the addresses are of the form “0x” with 40 alphanumerical characters on the end.
We will then use the following regex to parse the address (do not copy/paste as the Medium encoding for numbers causes issues) :
0x[a-zA-Z0–9]{40}
Zapier offers several options below the pattern but we shouldn’t modify them as we only want to match one address in the user’s tweet.
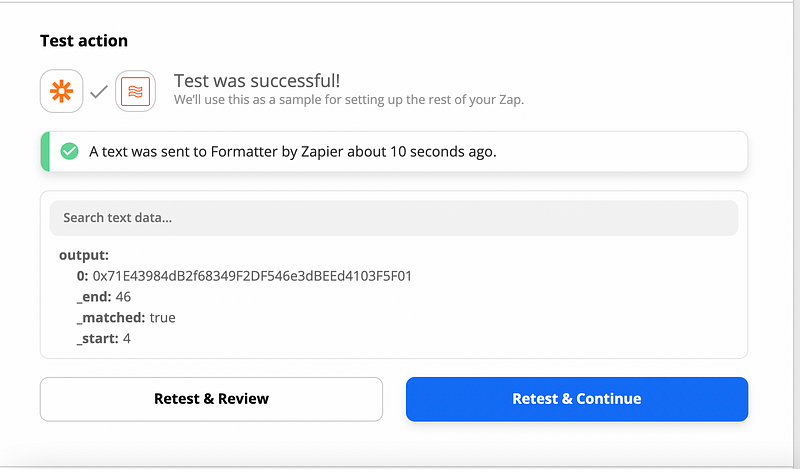
Once you test the filter you should see that kind of output:
VI) Mint new tokens for the user
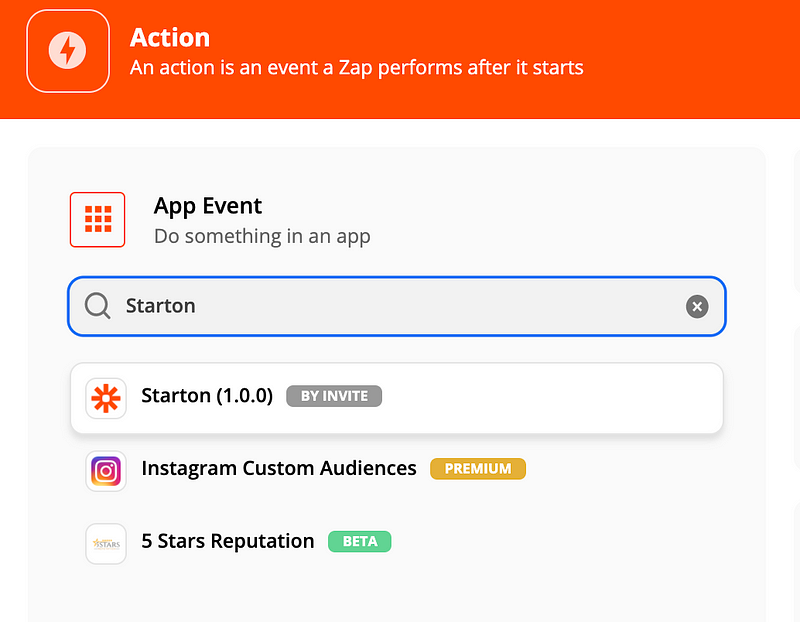
Our last “Action” will be a “Starton” action which you can find using the search bar in the action panel.
If you cannot find it, it means you didn’t open the invitation from the Starton interface as described in I).
We are then asked to choose an action event. As we want to mint new tokens on an existing contract we need to pick “Interact with your smart contract”.
You will be asked to connect to a Starton account by providing an API key so Starton can know you are the one trying to mint new tokens.
Your API keys can be found or created on the left panel of Connect’s interface in the Developer section.
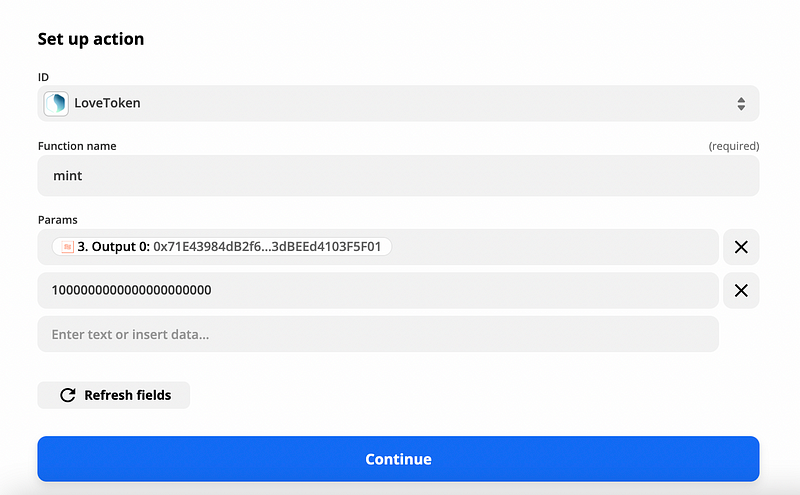
Once our account is linked, we need to pick the smart contract we want to interact with (the one created in I)), name the function we want to use, and give it parameters.
The function name here is “mint” and the parameters are the address and the amount.
The address can be found by choosing the 3D action “Text” and picking “Output 0” when expanding the options.
We will be minting 1000 tokens for our wonderful user so we give 1000000000000000000000 as the second parameter (including the 18 decimals).
We are then asked to test our action and once it is confirmed that it works, we can go live!
VII) Conclusion
Now, every time a user will retweet our original tweet providing their address, Zapier will automatically call Starton in order to mint new LOVE tokens for the user!
You can go and try to retweet ours.
Then after a few minutes, you’ll be able to find your tokens on Avalanche’s C-Chain explorer :
You can find it on the right side of your address page : https://cchain.explorer.avax-test.network/address/YOUR_ADDRESS
Thank you for following this tutorial on “how to create marvelous bots connecting Twitter to Blockchain without any line of code”!
We hope you enjoyed this tutorial and that it gives you wonderful ideas so you can create your own bridges that will make blockchain even more accessible.
See you at our next tutorial!