Create a POAP using Typeform
A POAP is a good way to reward your community with a quick and easy access to NFT airdrops and more.
Introduction
In this tutorial, you will learn how to create your own POAP (Proof of attendance protocol). The final goal is that your user receive an NFT by replying your form.
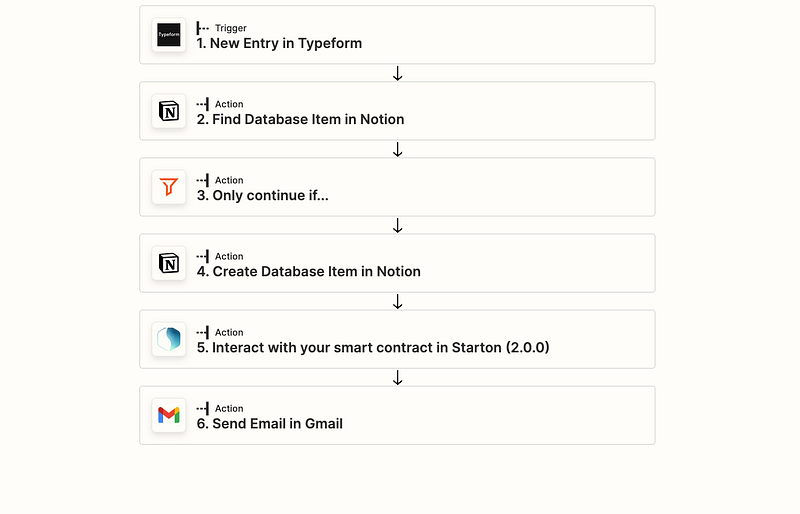
The POAP flow will look like this :
- The user fills and submits the typeform.
- Zapier will check if this user has already submitted the typeform. If it’s not the first time, Zapier will cancel the process. If the user is not registered, Zapier will add him in the database and jump to the next step.
- Zapier will call the “mint” function of our smart contract and send the NFT to the user’s wallet.
- Zapier will send an email to the user.
If you have any questions, you can join our Discord by clicking here.
Requirements
This tutorial assume that you already have deployed your NFT. If it is not the case, you should jump to this tutorial → Deploy a NFT using Starton.
You will also need a premium Zapier account to 100% complete this tutorial.
Summary
It will be divided in different chapters
- Create your Typeform
- Connect Typeform with Zapier
- Create our database
- Verify if the user can receive the NFT
- Send the NFT using Starton
- Send a confirmation email
- Going further
Are you ready ? 💪
1. Create your Typeform
At first, we will create our POAP form.
There is no real complexity here, connect to your typeform account and write the questions that you want to ask.
For my example, i am asking the name, job, company and of course the wallet address.
2. Connect Typeform with Zapier
Once your typeform is ready, it is time to go to zapier.
Zapier is an ifttt like (If This Then That). The concept is to trigger an action when something happened. And when an action is triggered, you can trigger another one… and another one…
It will be very useful for us ! If you want to learn more about zapier, you can go here → How it works.
Okay, let’s connect to your Zapier account (or create one), and click on create Zap !
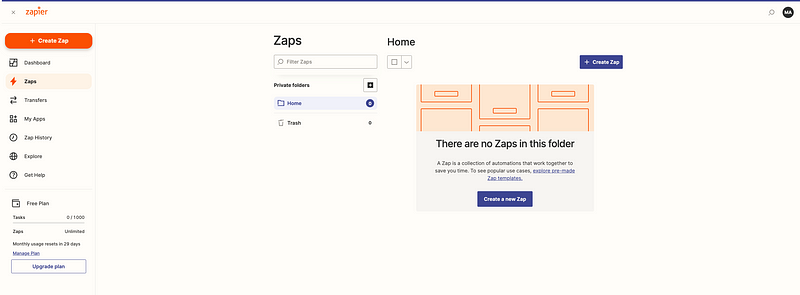
Something like this should appear:
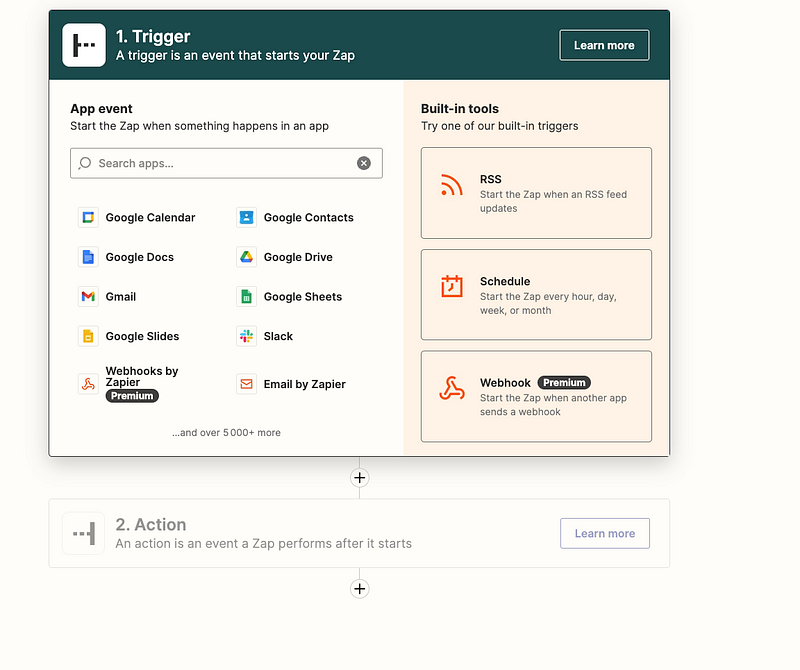
Write “Typeform” in the searchbar and click on the application.
Then, in the “Event” section, select “New Entry”.
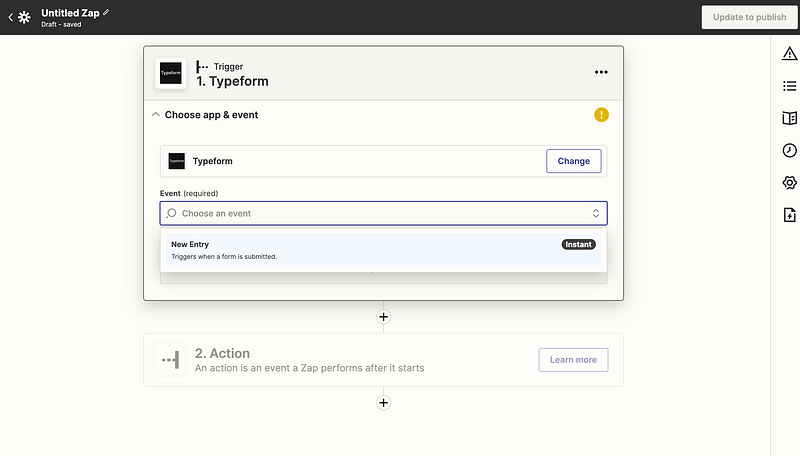
Therefore, each time an user will fill your form, it will trigger our Zapier integration !
Click on “Continue” and sign in to your Typeform account in the popup.
Once you are logged, Select your form in the “Form” field and press continue.
The last step is to test your Zap. Click on “Test your Trigger”.
You should have the following success message “We found an entry!”.
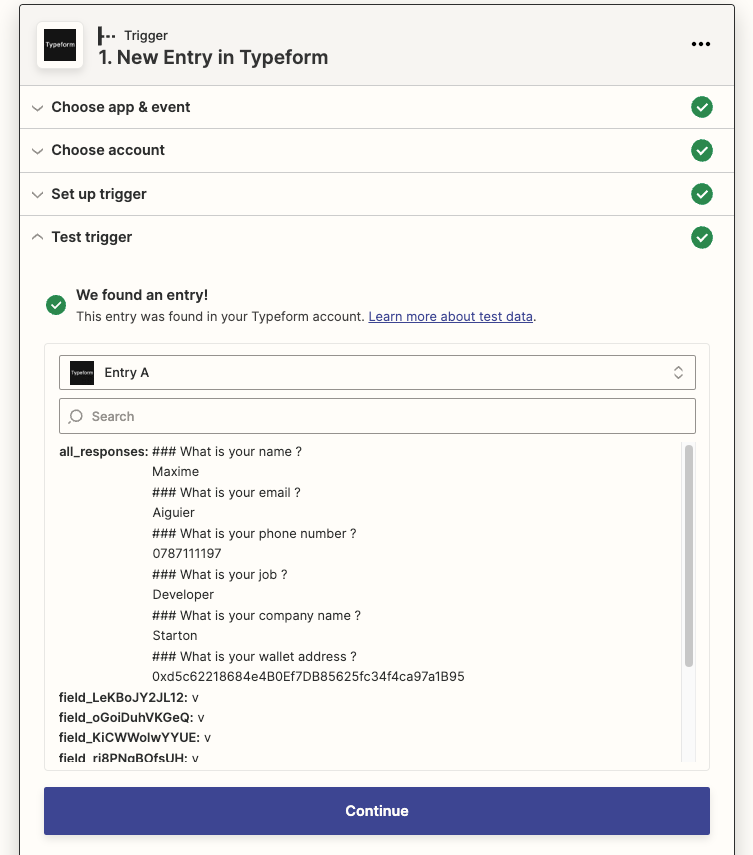
If you have something similar, it is perfect. See you next step !
3. Create our database
We now have our form, and we can trigger anything when it is submit. But before doing this, we have to make sure that our NFT will be sent one time only per wallet.
Therefore, before calling Starton, we have to create a database, store our new users in it and check if a wallet that submit the form is already registered or not, in which case we will cancel the process.
In this tutorial, my database will be hosted on Notion, but feel free to use the tool you are the most comfortable with.
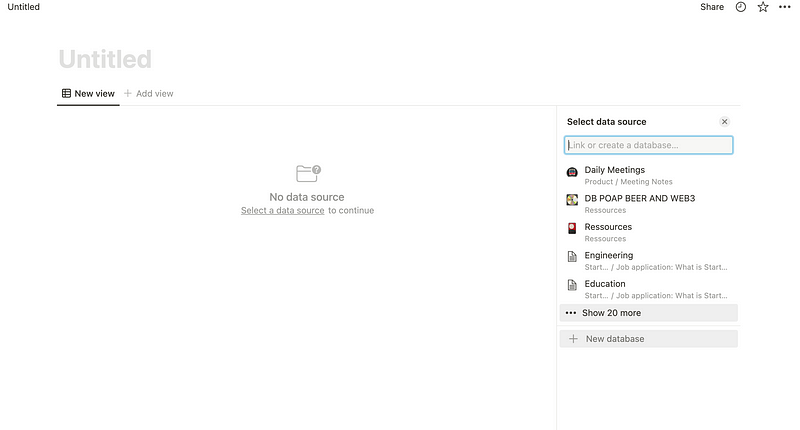
To create the database on Notion, nothing easier !
Create a new page and select the “Table” option.
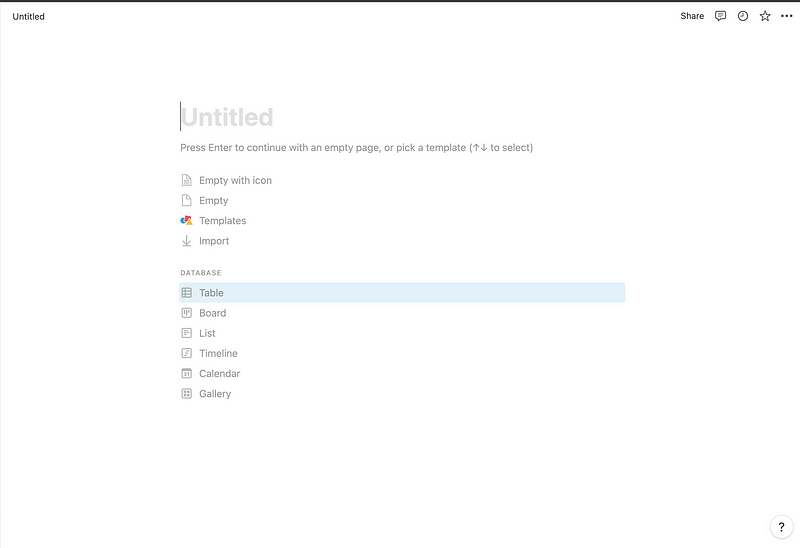
And then click on “New database”
The last step is to create the column related to your typeform option
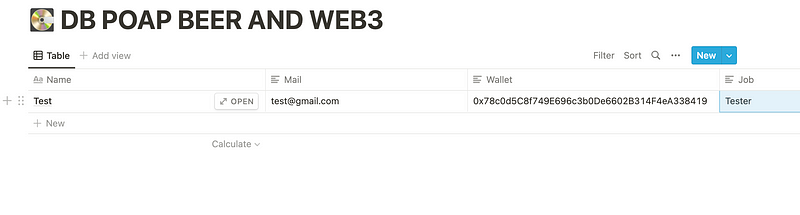
For me, it is “Name”, “Mail”, “Wallet” and “Job”.
4. Check if the user can receive the NFT
Now, we have our database, but we have to fill it when a new user fills in the form. It will cancel the whole operation if the user already exists.
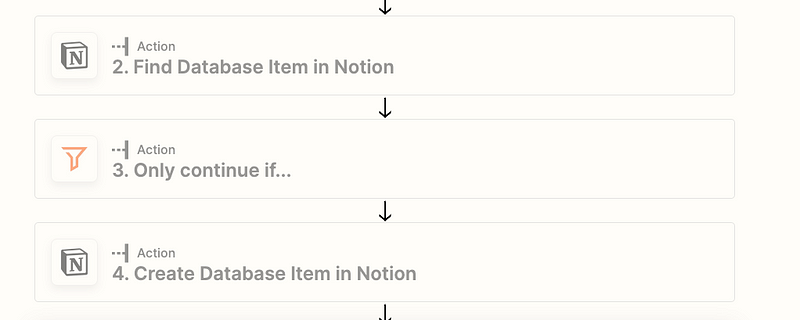
To do this, we will need three zaps:
- A zap to get the notion and database and to find if the wallet of the user who submited is already registered
- A “Only continue if” Zap that will cancel the process if the wallet is already in our database
- A “Create Database Item in Notion” zap that will add the user in database.
Okay, let’s go !
Under our Typeform Zap, add a new action “Notion”
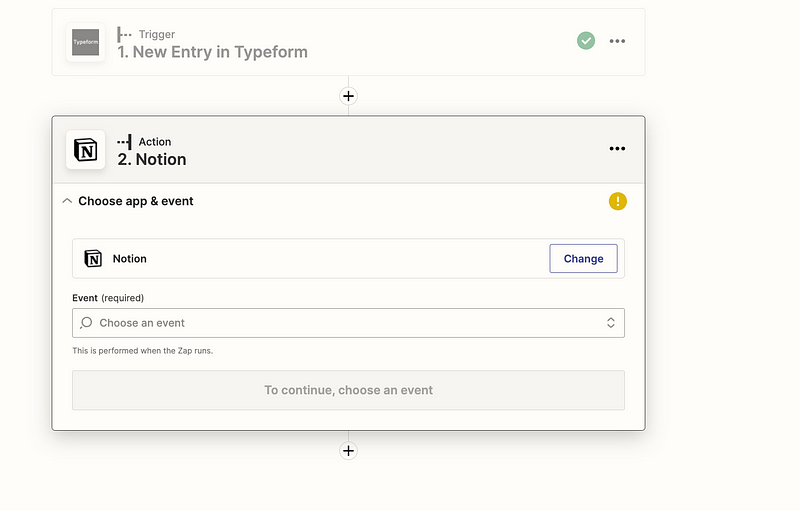
In the “Event” field, search “Find Database Item” and press “Continue”.
Then, connect to your notion account and select your database in the list.
The last step is to fill the “Wallet” parameter with the one in your Typeform result.
You should have something like this:
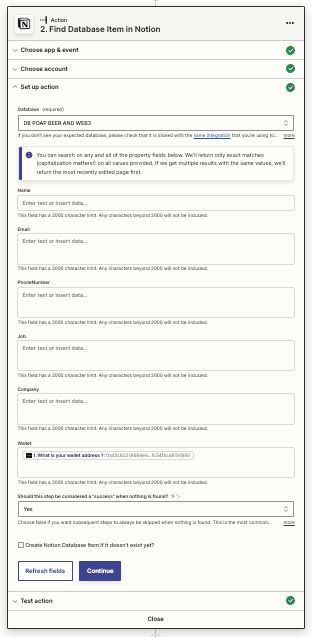
That’s all! Test your trigger, and let’s create our “Only continue if”.
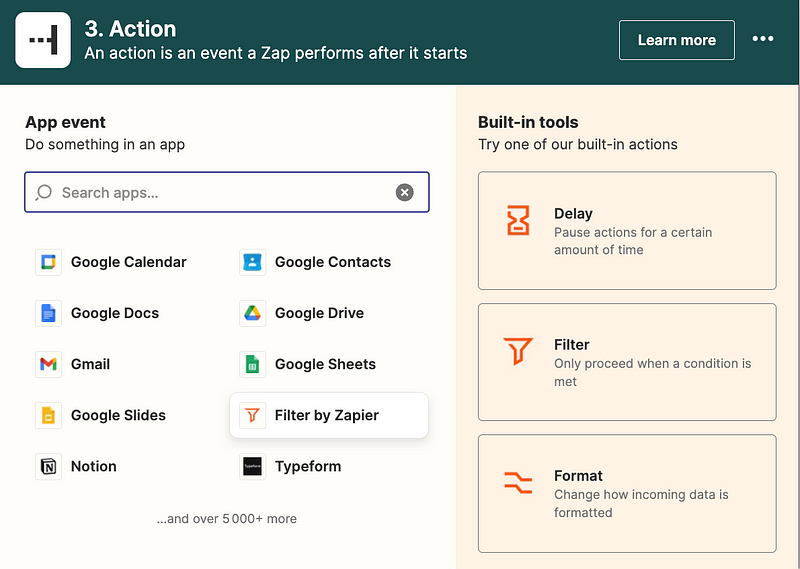
This one is very easy. In the “Action” field select “Filter by Zapier”
And in the list select “Zap search was found Status: true” is false.
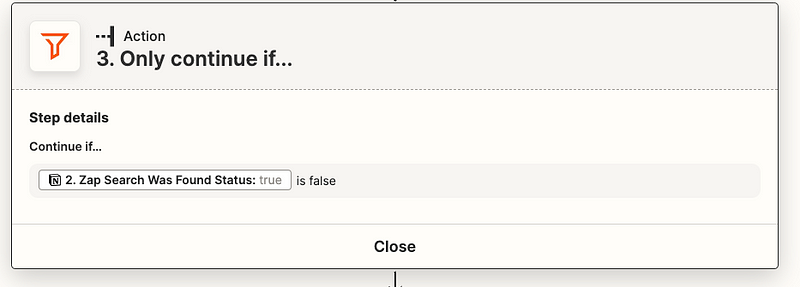
Basically, it means that if the result of the query in our database did not lead to a result, we can continue.
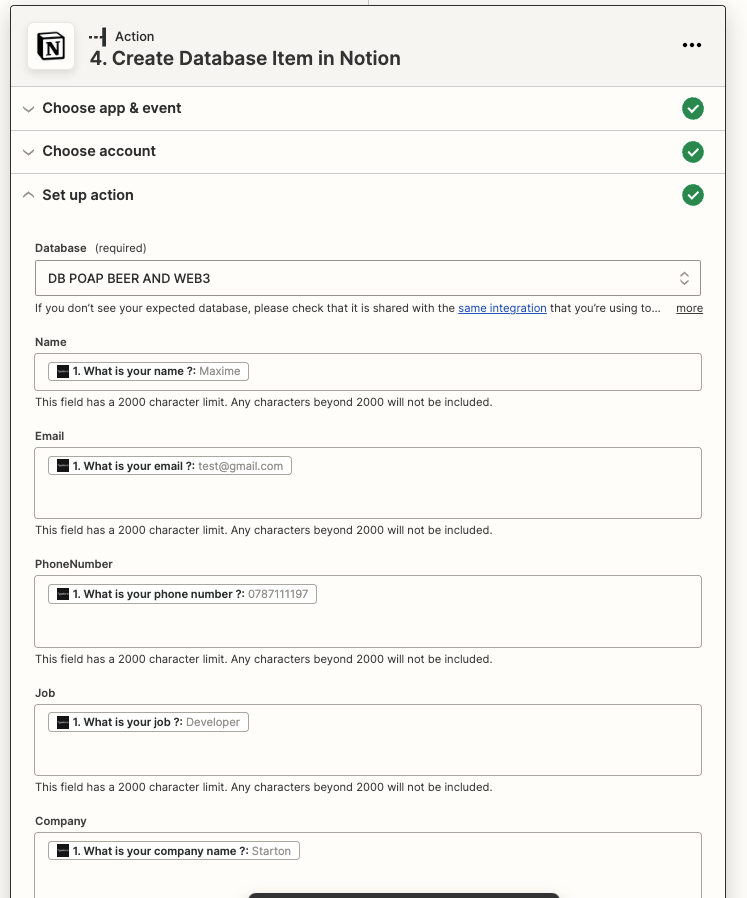
The last action to trigger is… To create our user in database, you were right !
At this point, you should know what we will do.
Let’s create another “Notion” action, and this time we will select the “Create Database Item in Notion” action.
Select your database, and fill each field of your database with the corresponding fields of Typeform.
You should have something like this:
Test your integration… and that’s done !
The next step will be to create our Starton integration to send the NFT to the user !
5. Send the NFT using Starton
Before creating our Starton action, you should have created your NFT and deployed your smart contract. If not already done, take a look at this tutorial and come back when it’s done.
For those who stayed, are you ready?
You may have guessed it, we will start by creating a “Starton” action.
There is a little tricky things, the Starton’s zapier connector is not public To get access to it, you have to go to app.starton.com→ plugin and click on “Zapier”. You can also click here.
Once you have accepted the invitation, go back to your zap and add the “Starton” action.
Zapier may ask you to paste your API_KEY. You can find it on app.starton.com via the “developer” panel.
In the “Event” list, choose “Interact with your smart contract” and select the smart contract related to your nft.
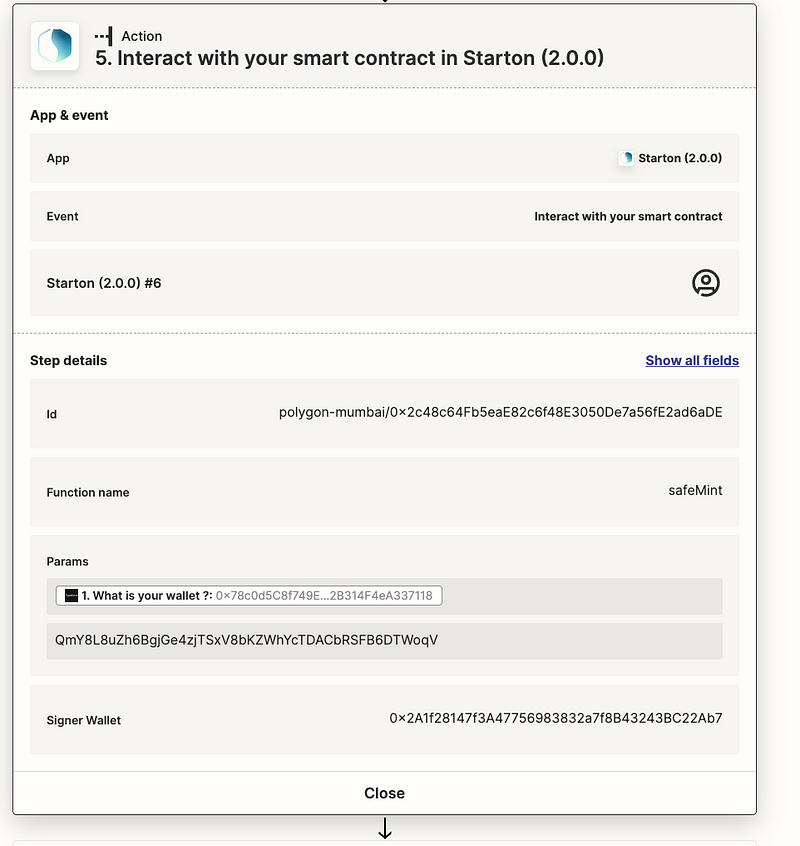
Fill in informations like the following pictures :
id: The id of your smart contract
Function name: the name of the fonction you want to call (here it is “mint”)
Params:
- Receiver wallet address (in the typeform)
- CID of your NFT (Upload the metadata json of our NFT in the tutorial)
You should have something like this.
As usual, test your action before going to the next step.
6. Send a confirmation email
This is the last action of our Zap !
It is aim at sending an email to the user to confirm them that their nft is on the way.
Lets go !
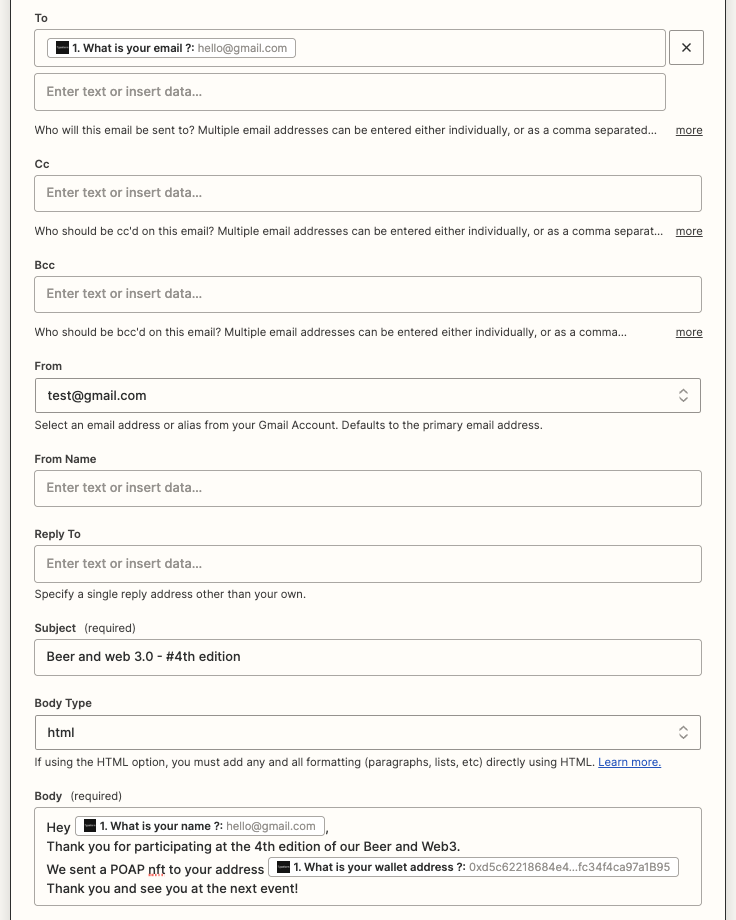
Create a “Gmail” action and select “Send email” in the event list.
Select the sender address, and fill the field corresponding to the email you want to send.
This is how mine looks like:
And that is done.
Test this last action, and you can publish your zap by clicking on the “Publish” button.
Try to fill your typeform, and let the magic happen !
7. Going further
Zapier is one of the most powerful tool i know. Once you have mastered the usage, you can connect anything to … anything. With Starton, you can connect the Web3 to anything, the only limit is your imagination.
You can check our other tutorials by clicking here : docs.starton.com
If you have any questions or want to join us, join our discord: discord.starton.com
Thank you for reading this tutorial, see you later for another one !